With summer underway, it is time to get started on your outdoor home improvement projects such as replacing your old garage door. Most companies that sell garage doors also offer full-service delivery, installation, and removal of the old garage door. If you prefer to take on home projects yourself, it is important to prepare, especially when it comes to DIY garage door installation. Here are 4 helpful tips to keep in mind during the installation process.
1. Carefully release the tension
Releasing the tension in the old garage door’s torsion spring will be the first step to complete before you can begin removing the old door and installing the new one. Although this is not a complicated process, it can be dangerous depending on the type of door you are attempting to release the tension from.
Do not attempt to adjust or remove a garage door that has a standard torsion-spring mechanism because these are under extreme tension and can be very dangerous to work on without proper training and equipment, so it is important to be aware of the type of mechanism your old garage door is equipped with before you begin the installation process.
2. Install quality weather stripping
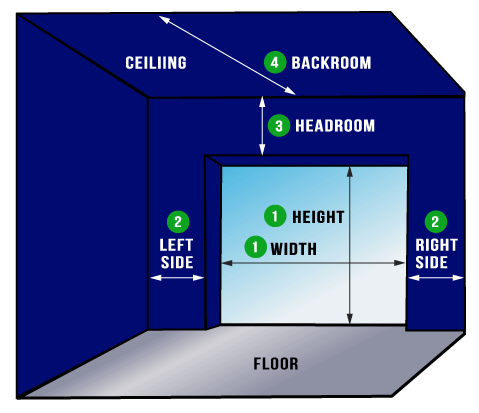
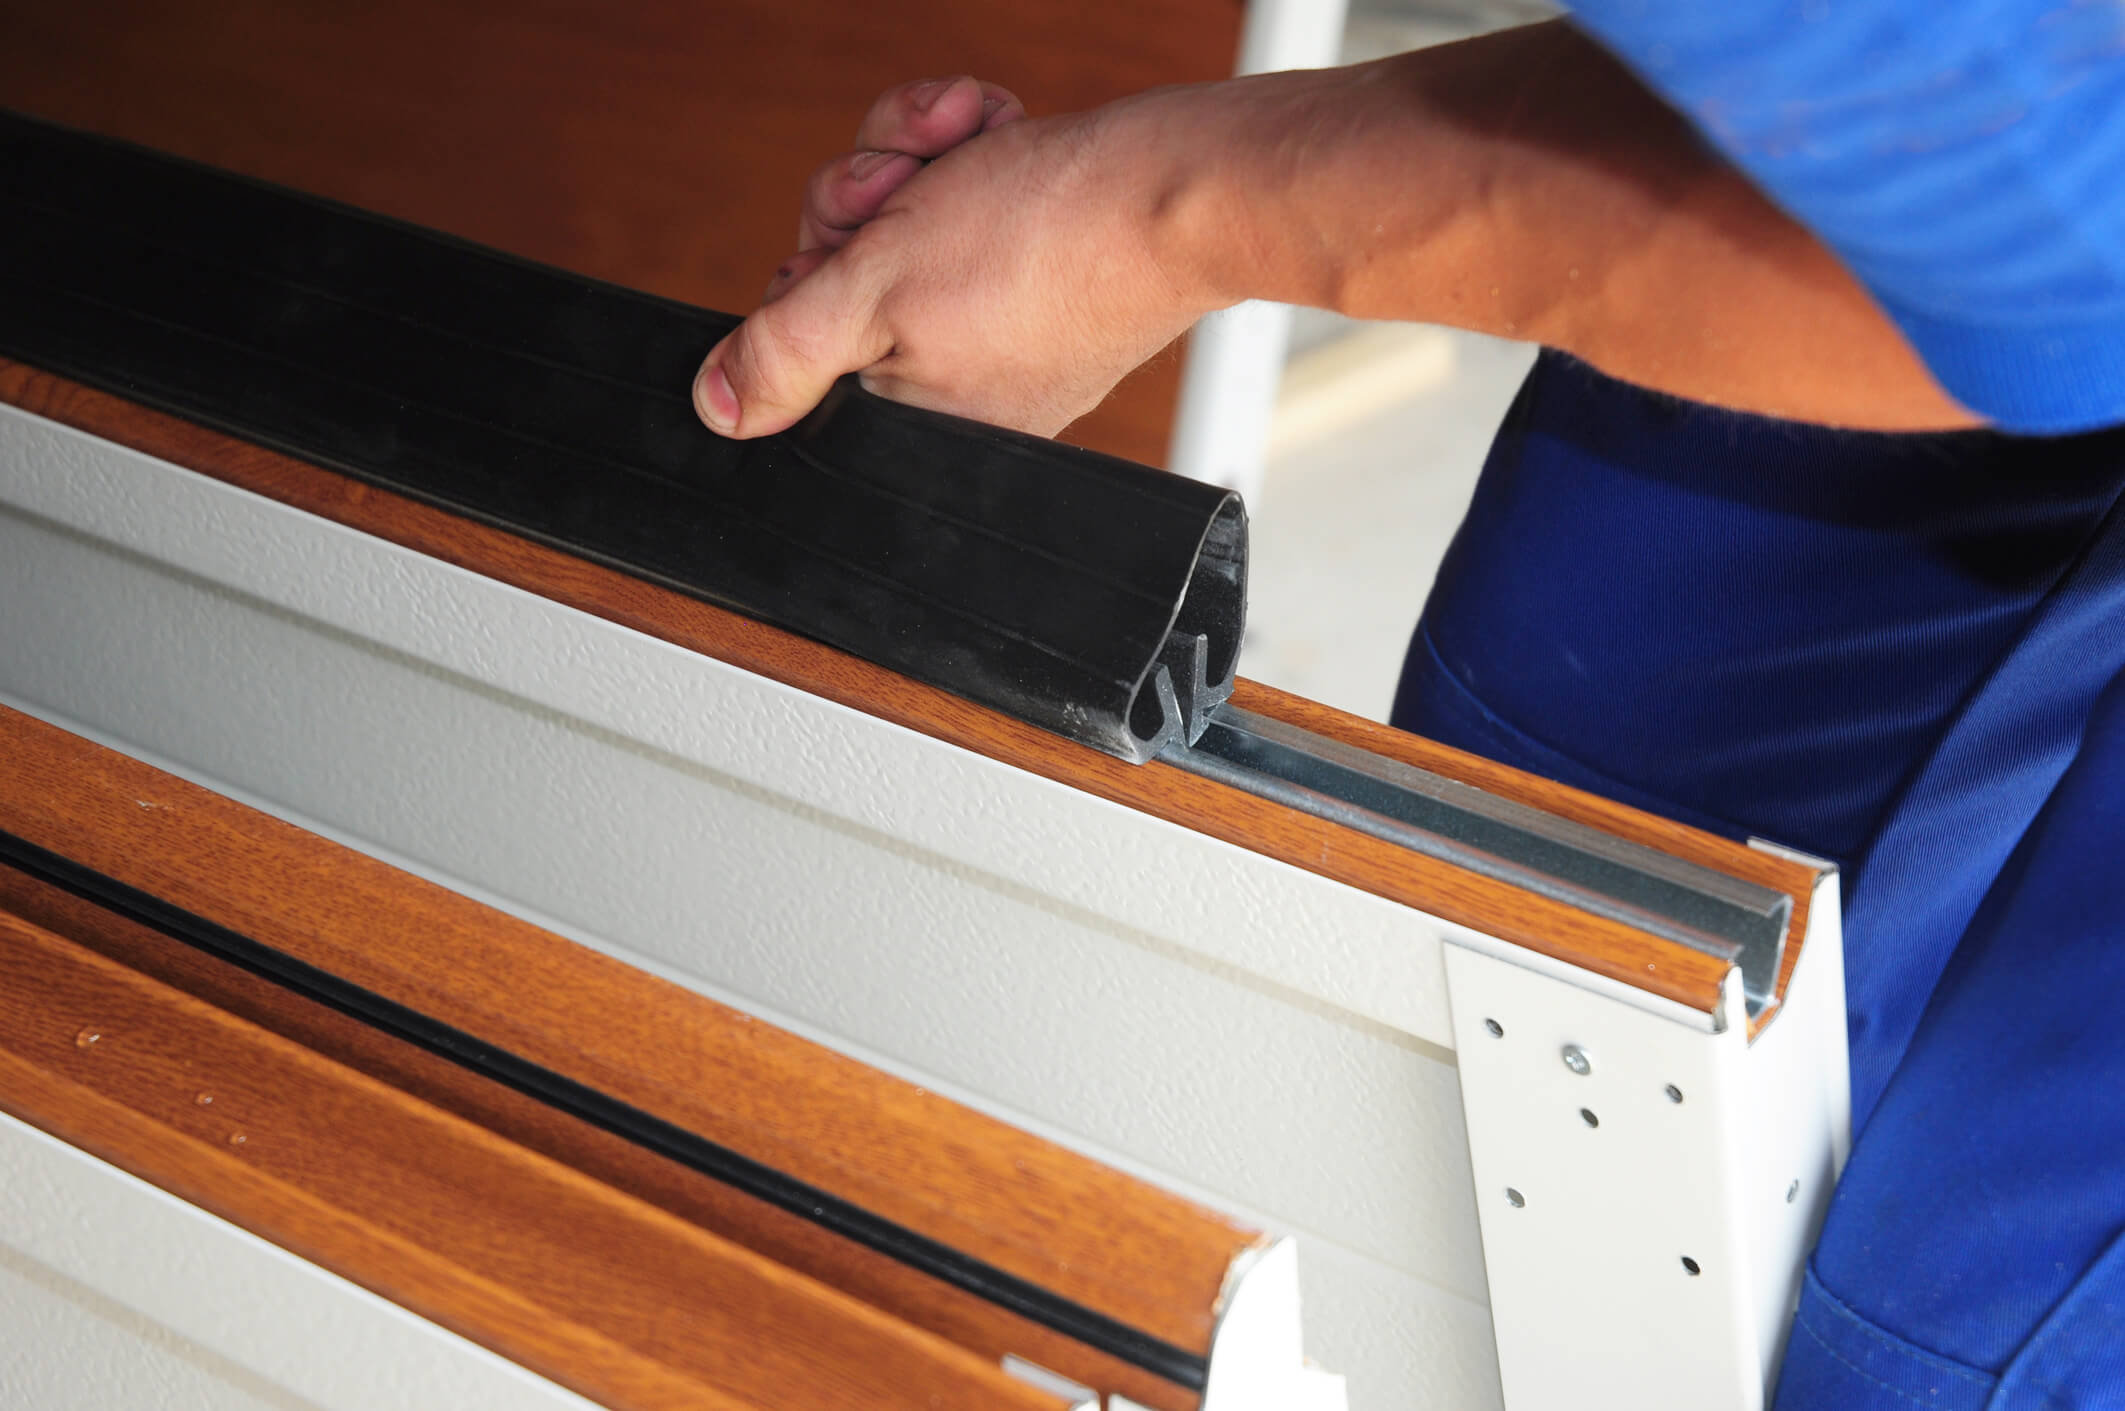 One of the first steps of installing a garage door will be attaching the bottom seal to the first garage door panel. This important piece is installed to make a tight fit between the garage door and the garage floor. This will help to limit air flow into the garage, keeping the air comfortable while you are working in the garage while also adding to the effectiveness of the door’s insulating properties. Flexible weather stripping should also be installed around the garage door to seal the gap around the edge of the door.
3. Don’t attempt the installation alone
Having a helping hand can be extremely beneficial when completing a DIY garage door installation. For example, installing each section of the door and their rollers into the tracks requires one person to lift the door section, while the other person sets its rollers into the vertical tracks on both sides of the doorway. Other steps such as installing the curved and horizontal portions of the track are also made easier to complete when done with help from another person.
4. Use chalk lines for spring tightening
One of the last steps in garage door installation is tightening the springs. The manufacturer’s manual will help you determine how many turns must be made to properly tighten the spring. By snapping a chalk line across the springs you can keep track of how many turns you have made to ensure they are tightened to manufacturer specifications.
At Garage Door Discounters, we have trained installation experts available to ensure your garage door installation is completed with safety and quality in mind. Contact us today to learn more about our garage door installation services.